14. Finishing and Decorating Inside

interior-port-forward-view

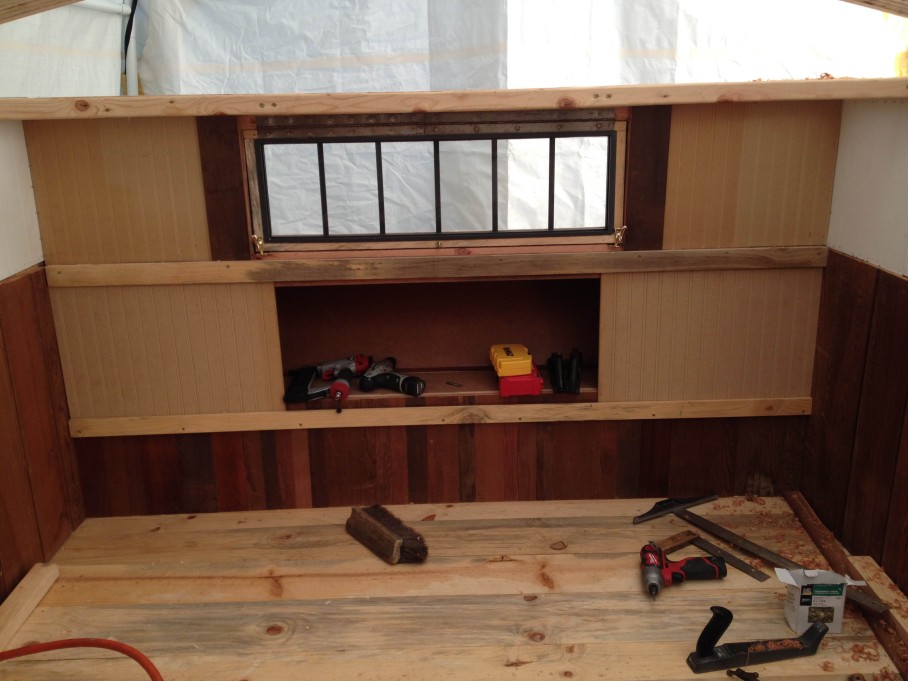
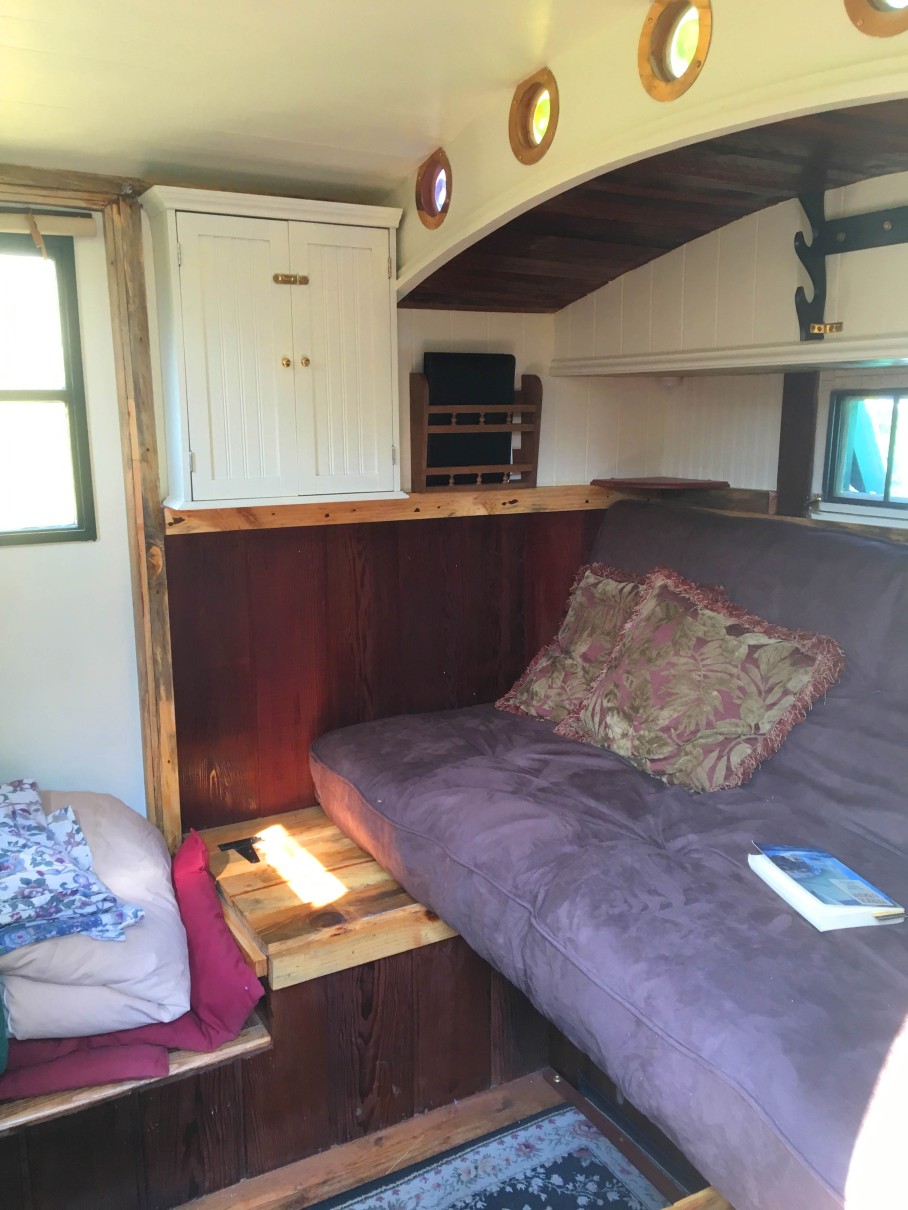
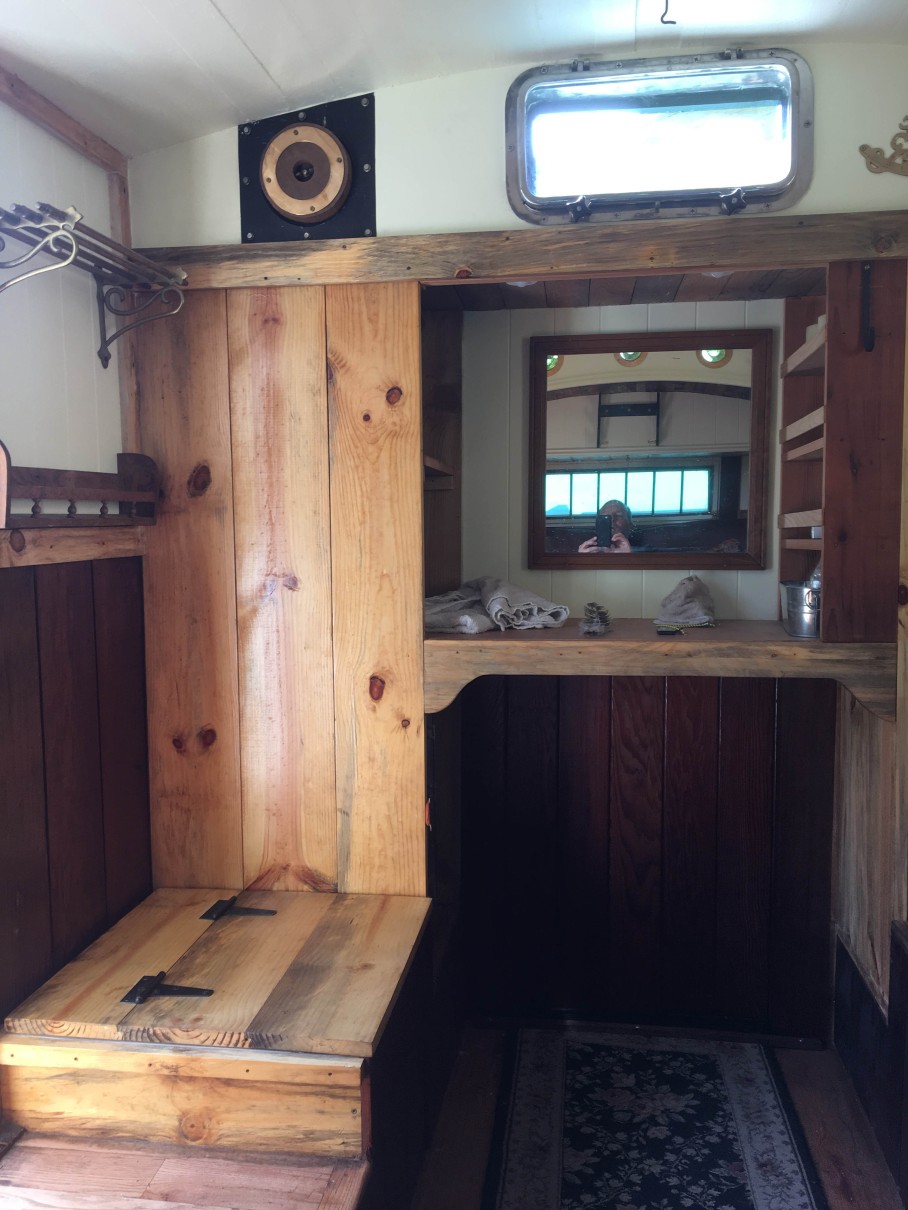
Inside view forward, port side. The oak flooring, pine trim and redwood wainscoting has been finished with polyurathane. Paneling has all been patched and painted. You can see some nice wood moldings on the forward bulkheads, the weapon rack is up (it fits two bows including my 6′ longbow), there is a runner carpet cleated down to the floor, corner shelf, magazine rack, medicine cabinet and super thick coil spring futon in couch position.

library-closed

This little medicine cabinet was ripped in half on the table saw and the shelves positioned with the right spacing to…

library-open

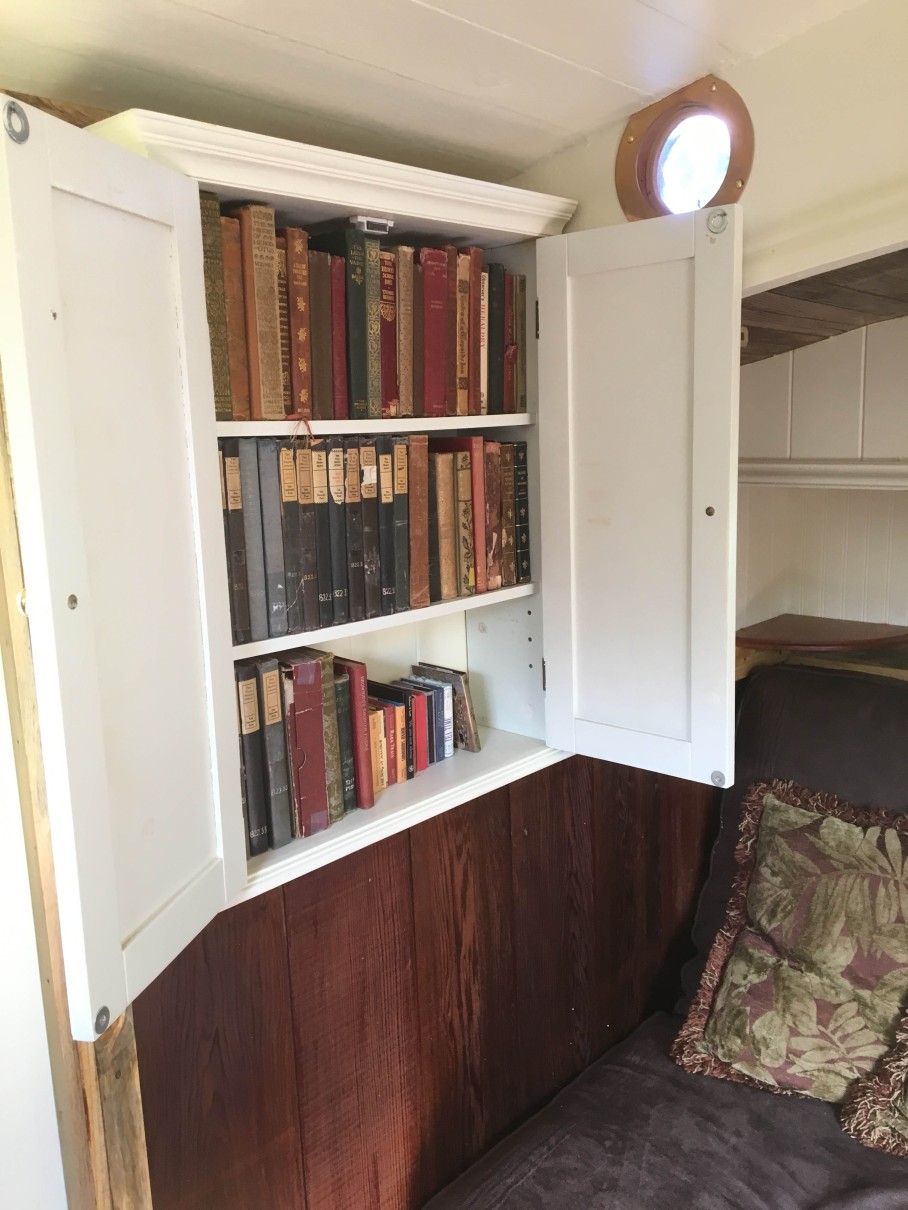
…make a library cabinet! I have been collecting these small edition books for years, and now there’s a place for them.

forward-portholes-ii

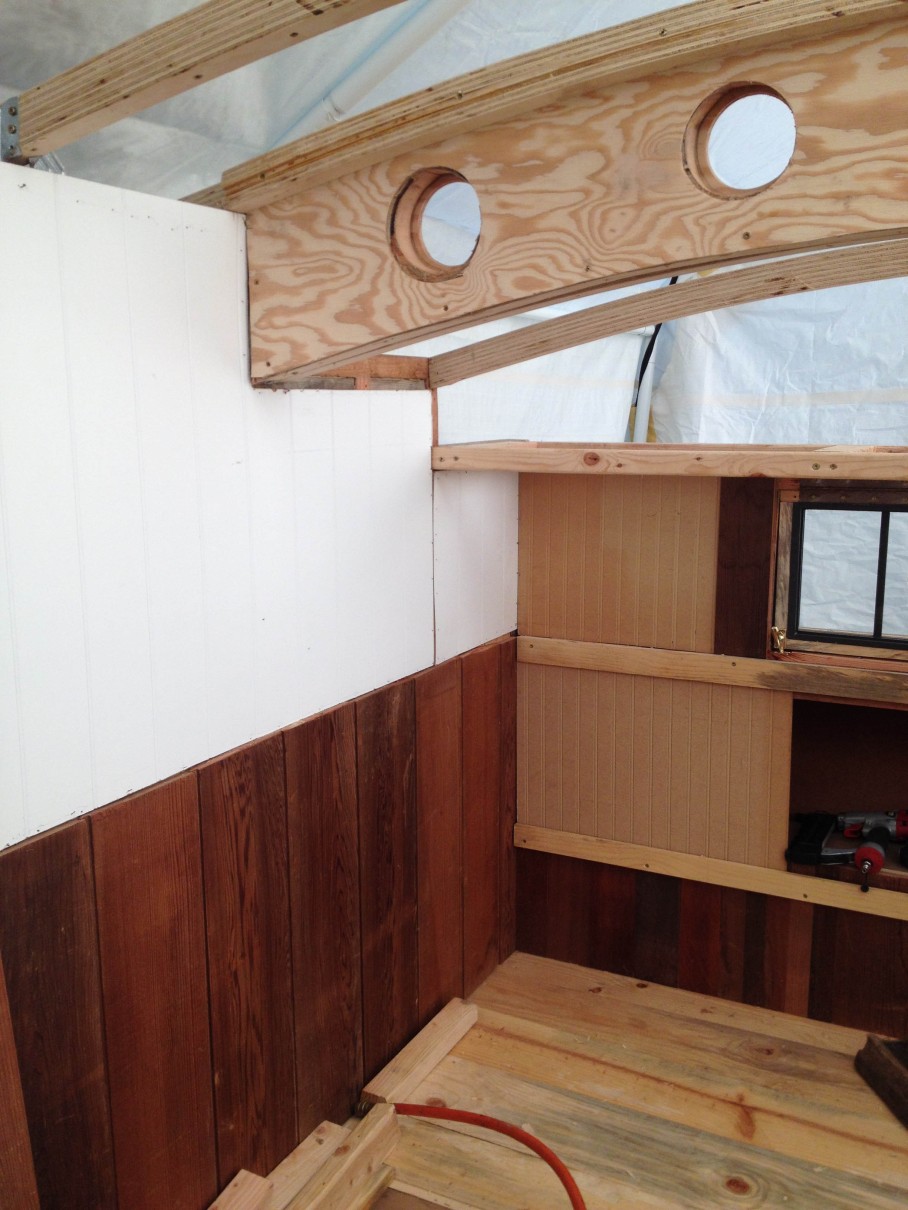
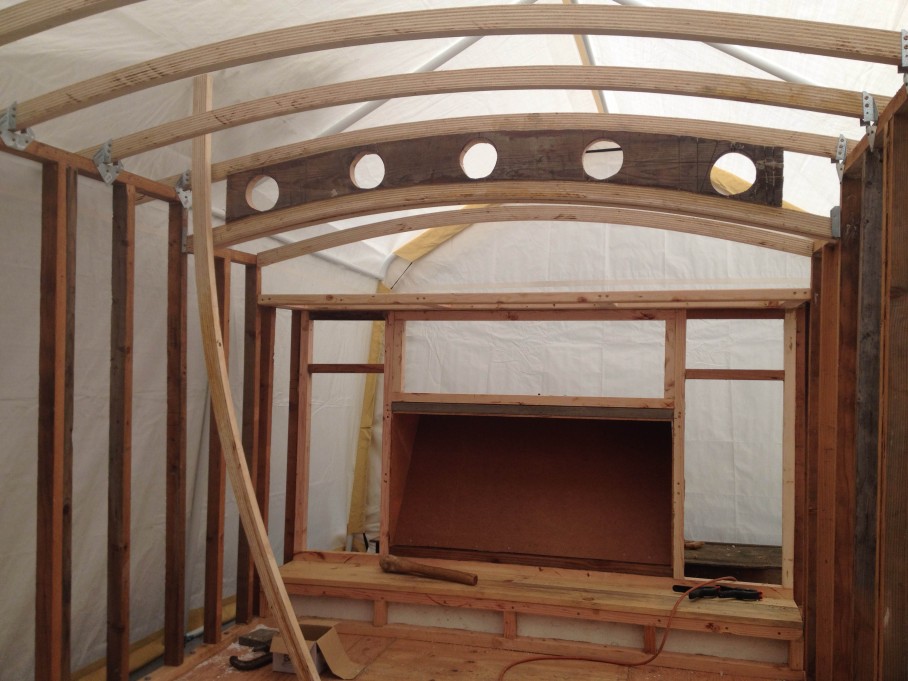
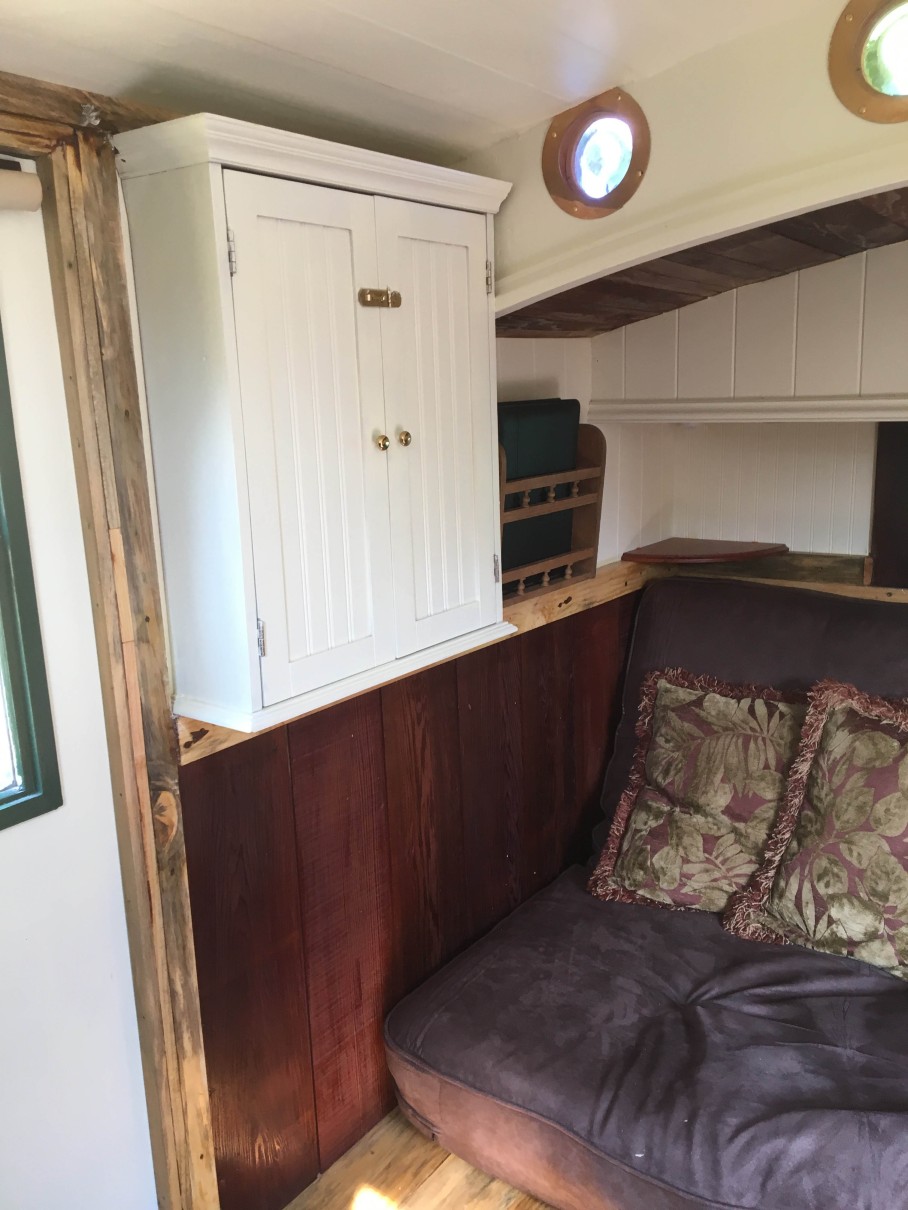
Inside looking forward. Of particular note, the portholes have been filled with colored glass. These were in fact candle stands made from recycled glass by Fire & Light, a local company, and which are easy to pick up at local flea markets. The glass is put in with glazing putty, the hole sides trimmed out with veneer, and then capped off with a custom brass ring (made by Mike Rude). When the sun shines from the front of the Coach, the colored light plays on the white ceiling. Very pretty.

looking-out-starbord-door

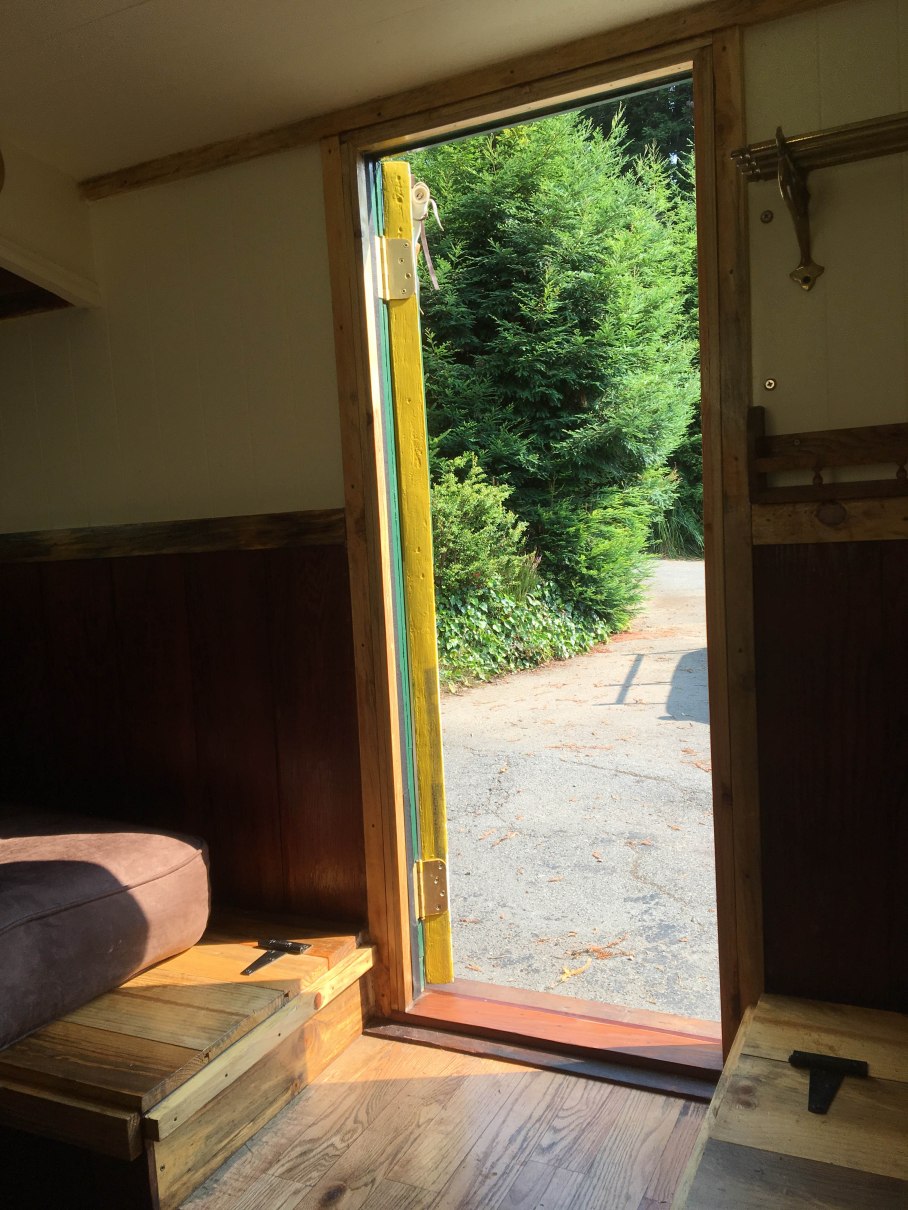
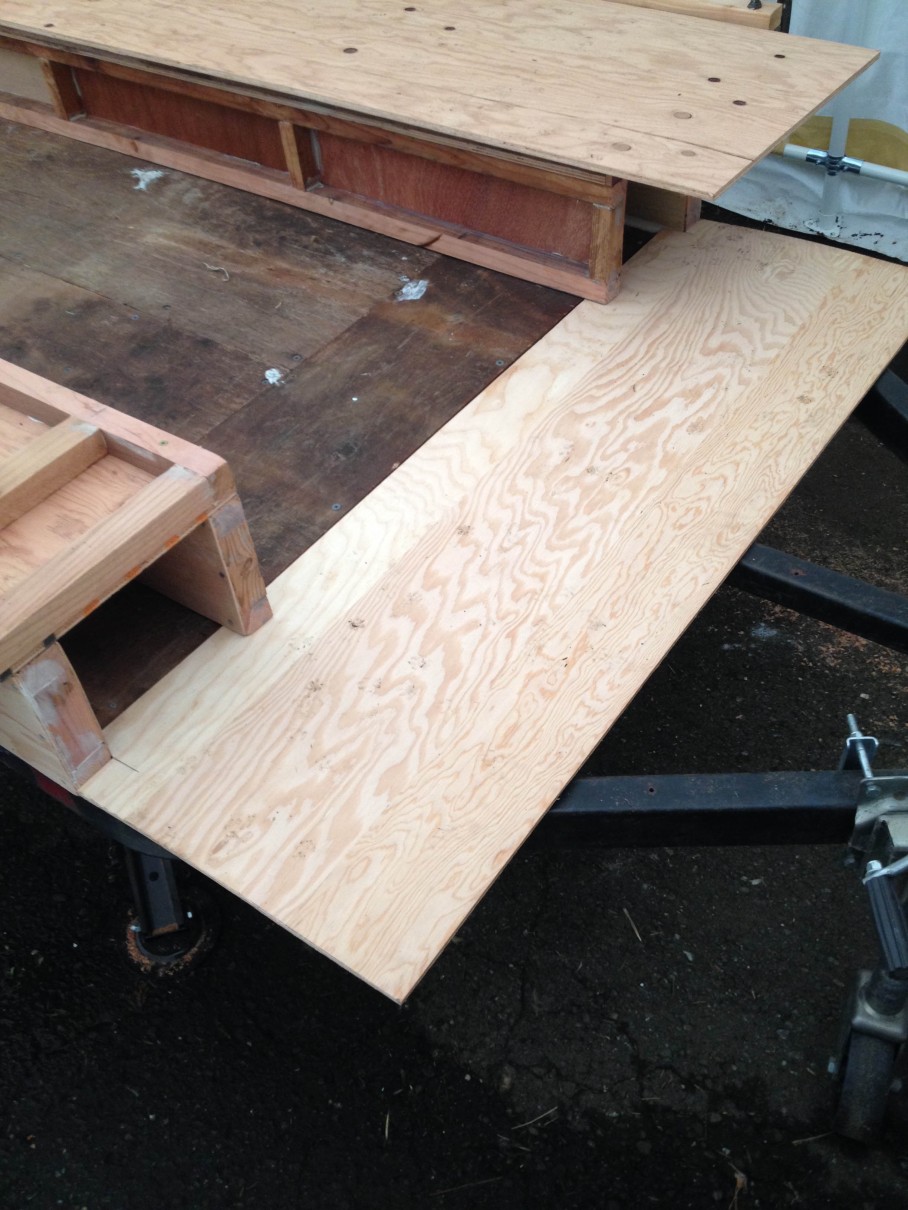
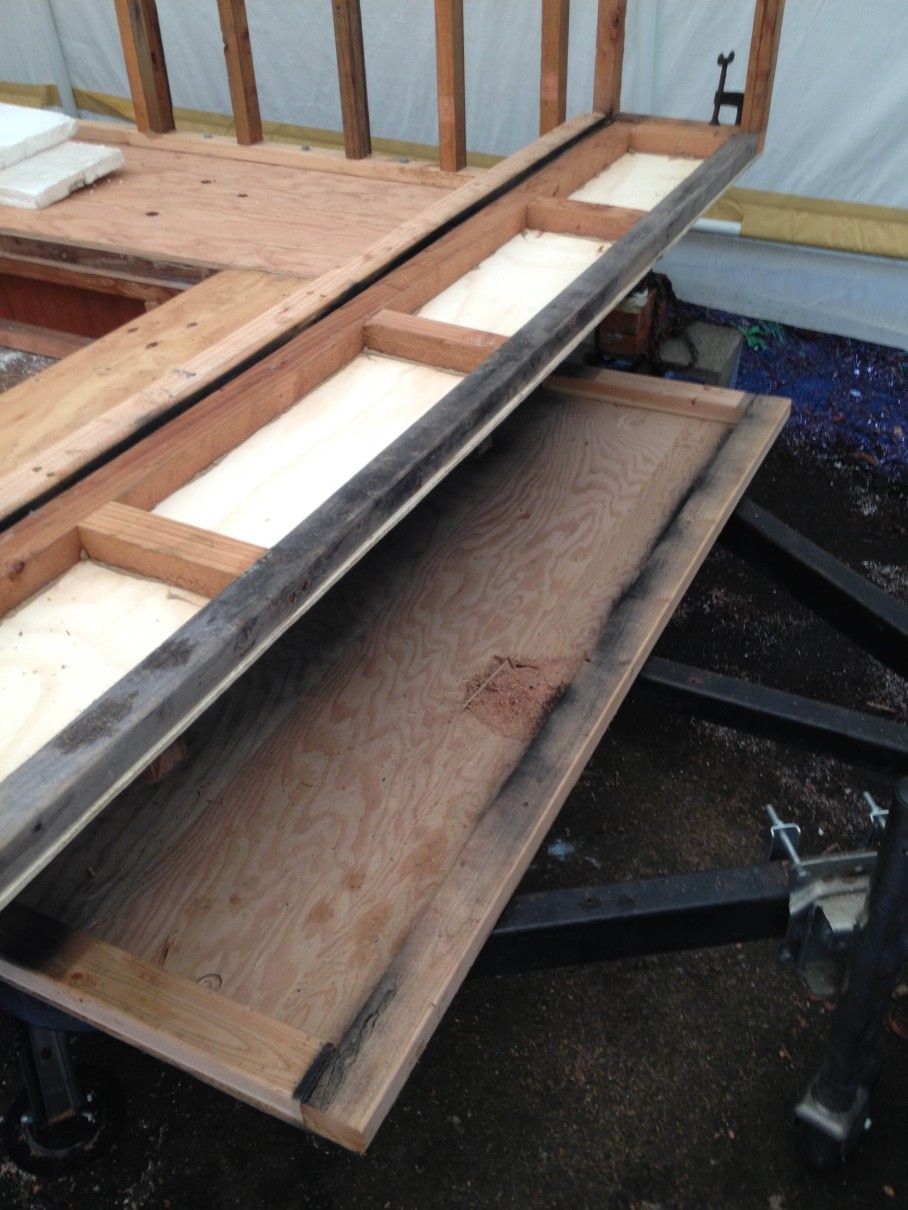
View out the starboard door, showing the oak flooring on the threshold, which has been waxed. You can also see two of the locker tops with their hinged lids. The two forward lockers store bedding, the port aft locker next to the wardrobe is for shoes and incidentals, while the starboard aft locker lid is actually a fake. The entire top lifts off and flips over to reveal a tile hearth for the wood stove.

stove-installed

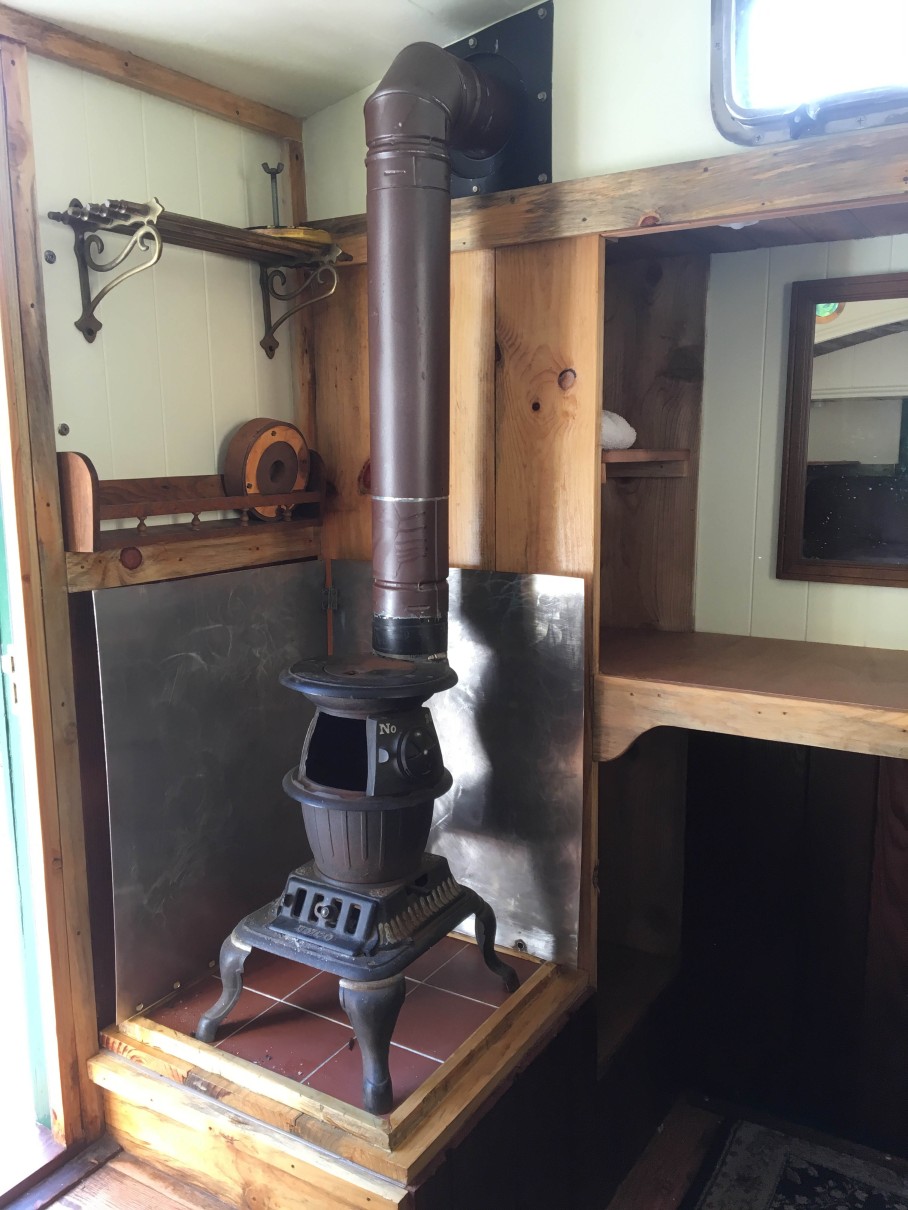
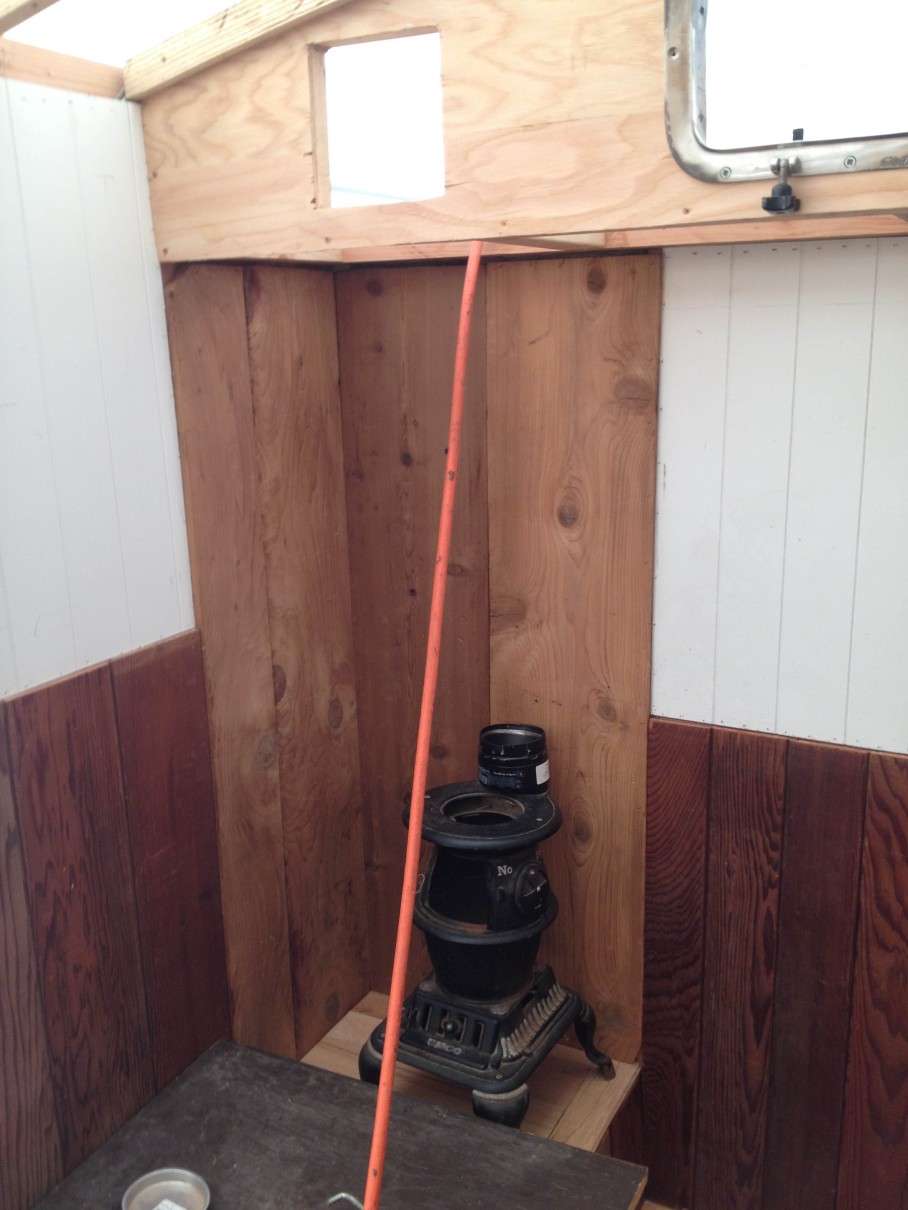
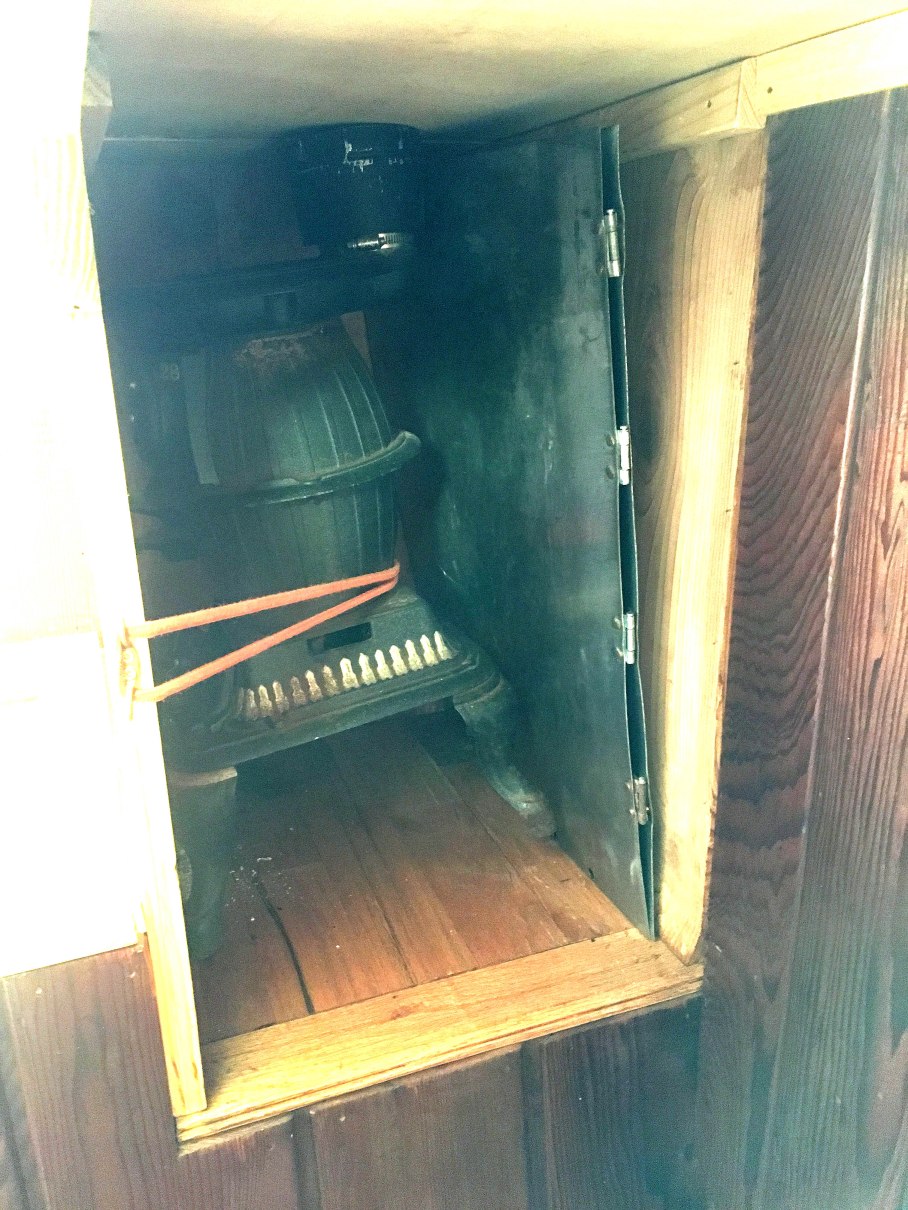
Here is the stove in place with chimney hooked up. You can see the tile hearth, and the heat shield I fabricated from heavy gauge stainless steel. Wood stoves in trailers are very tricky and I’m sure my setup would not pass muster with some people. The stove pipe is four inch double wall pipe that is rated for a one-inch clearance. It penetrates the side wall using the correct stove jack that provides three inches of clearance from any combustibles. Outside the chimney has plenty of rise to achieve a good draw, and it has the correct chimney cap. Before I can use the stove I need to strip and repaint it because someone painted it without using high temperature stove paint; I need to install spark arrestor screening in the chimney cap, and I need to install a carbon monoxide alarm inside the coach. With that, we will NEVER go to bed while the stove is burning. If ever we start to do any real cold weather camping I will look into getting a small airtight stove with a separate air supply.

chimney

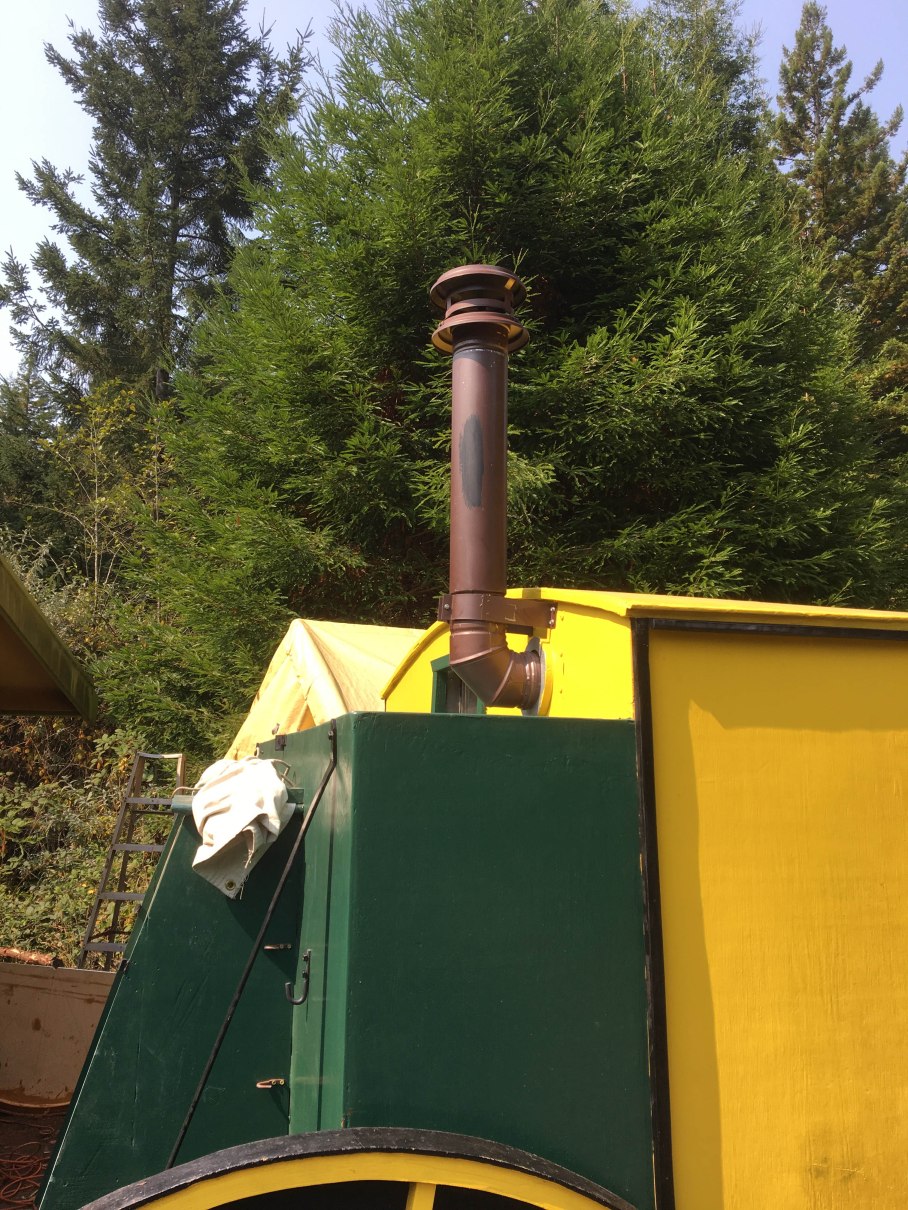
Here is the chimney set up with cap and bracket holding it straight. This setup is very sturdy, nonetheless we will not travel with the stove set up. Too much chance of it shaking loose and becoming a loose cannon on deck. The black splotch on the chimney is where I ran out of the lovely brown high temp stove paint and had to finish with black.

interior-port-aft-view

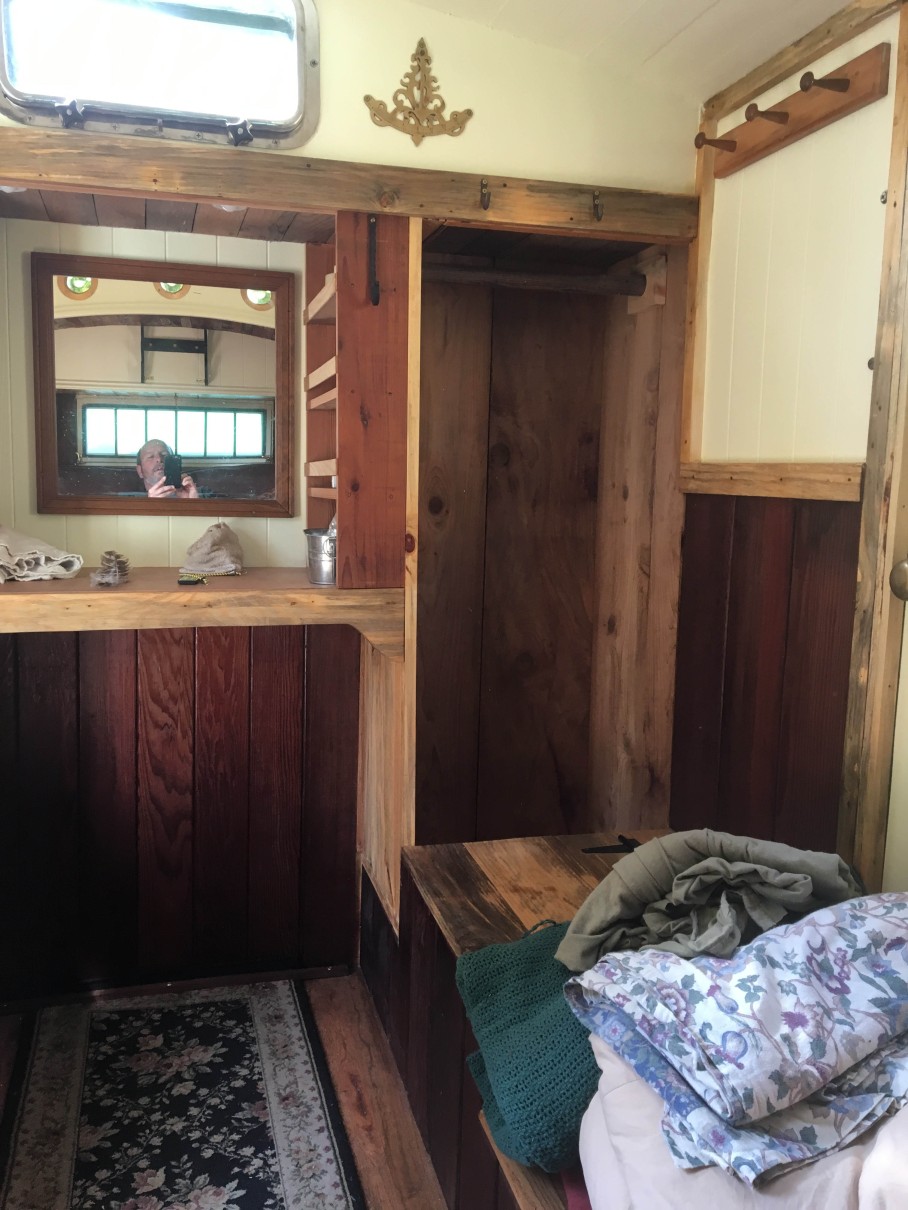
Here we are looking aft on the port side. The hanging wardrobe, coat hooks, hat hooks and back table are all visible. Note the inclinometer which will tell us if we are parked off kilter.

interior-starbord-aft-view

Looking aft to starboard. The hearth is hidden under the fake locker lid, and the stove jack is plugged for travel.

interior-aft-view

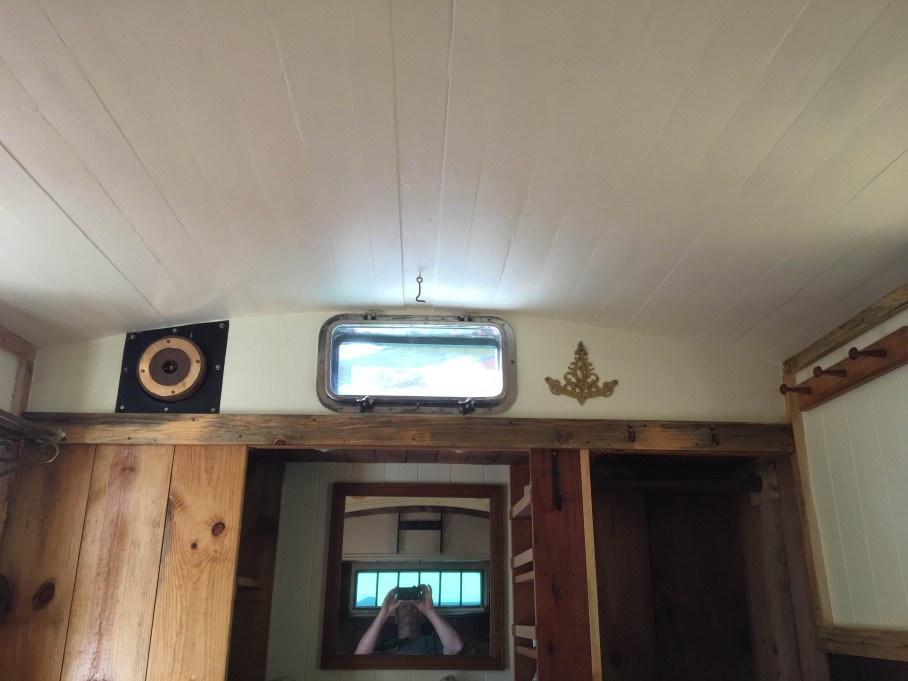
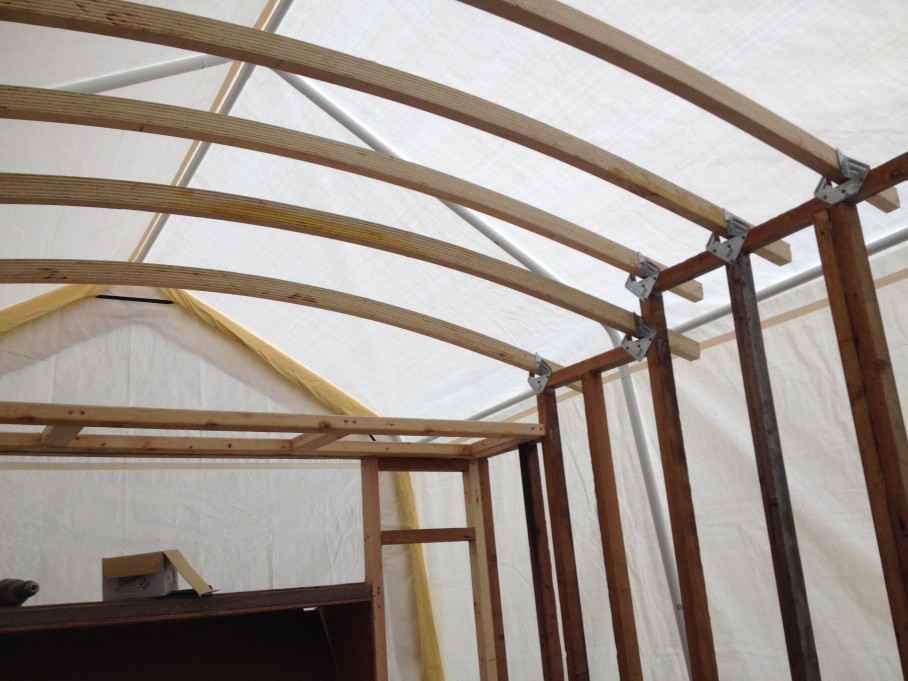
Shot of the ceiling looking aft

aft-ditty-shelves

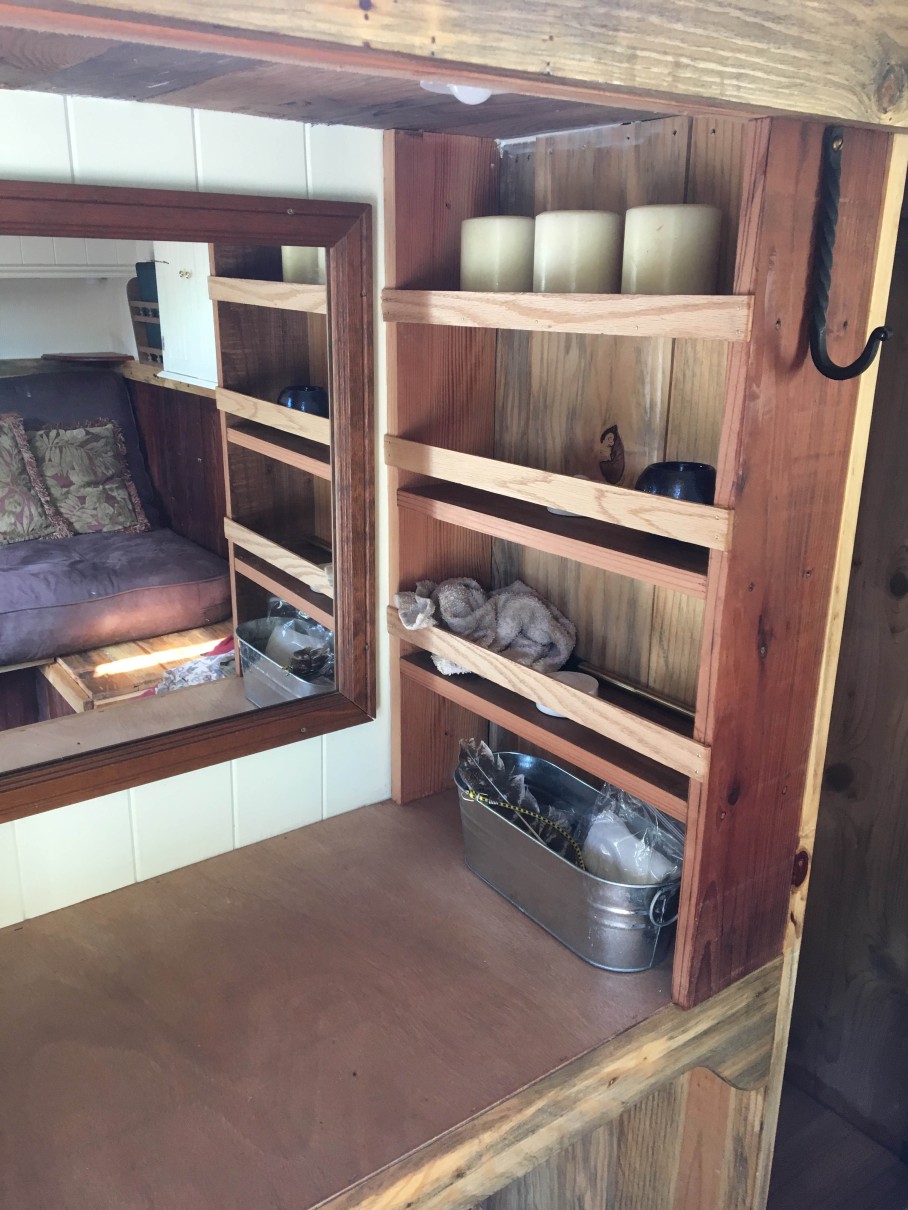
Here we are looking at the built in table and shelving. This is intended to be the dressing area or vanity for putting on makeup, etc. But it will also be handy for making tea using the wood stove. At the top you can see an LED light peeking out. These are cool little stickup lights we found at Costco that work manually or off a remote control. They can be dimmed to provide lighting control within the coach.

aft-gear-shelves

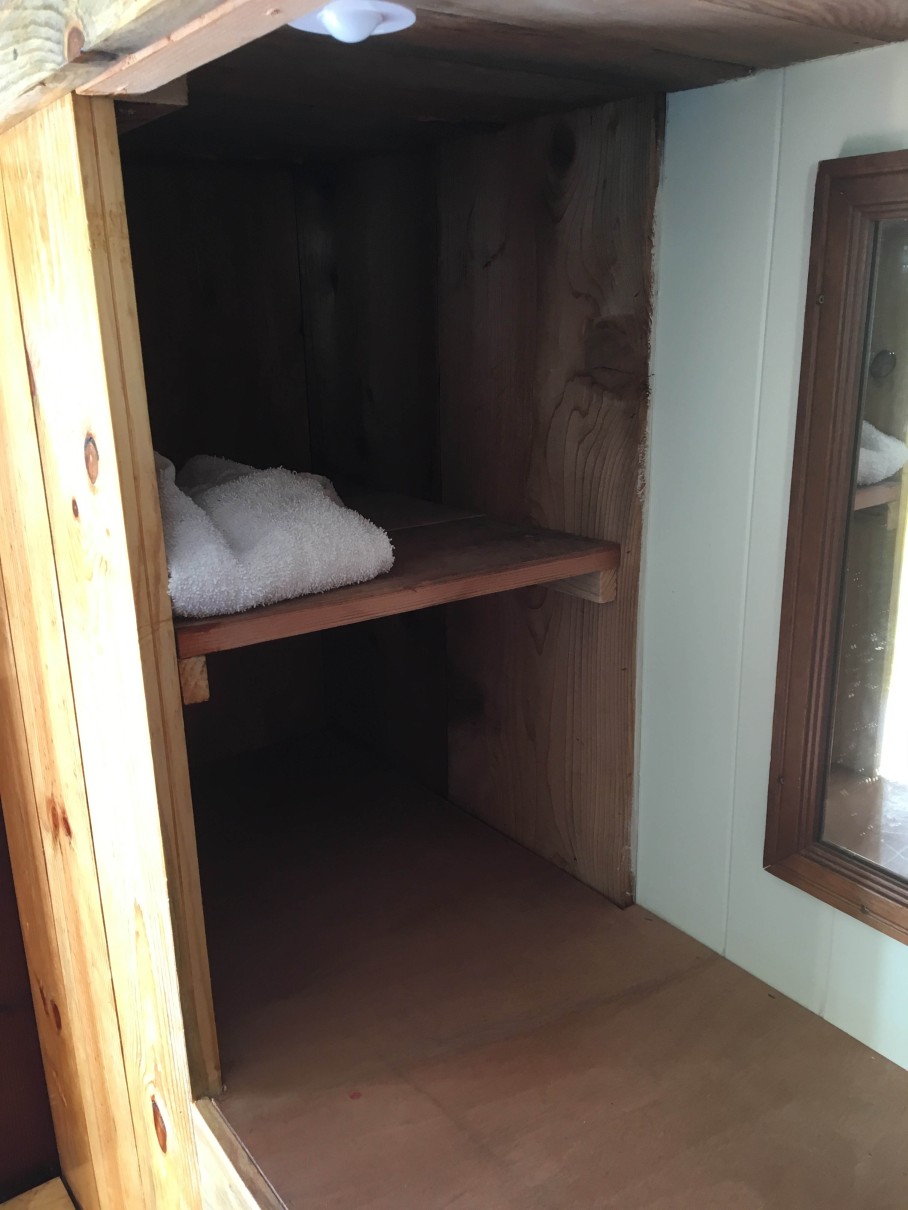
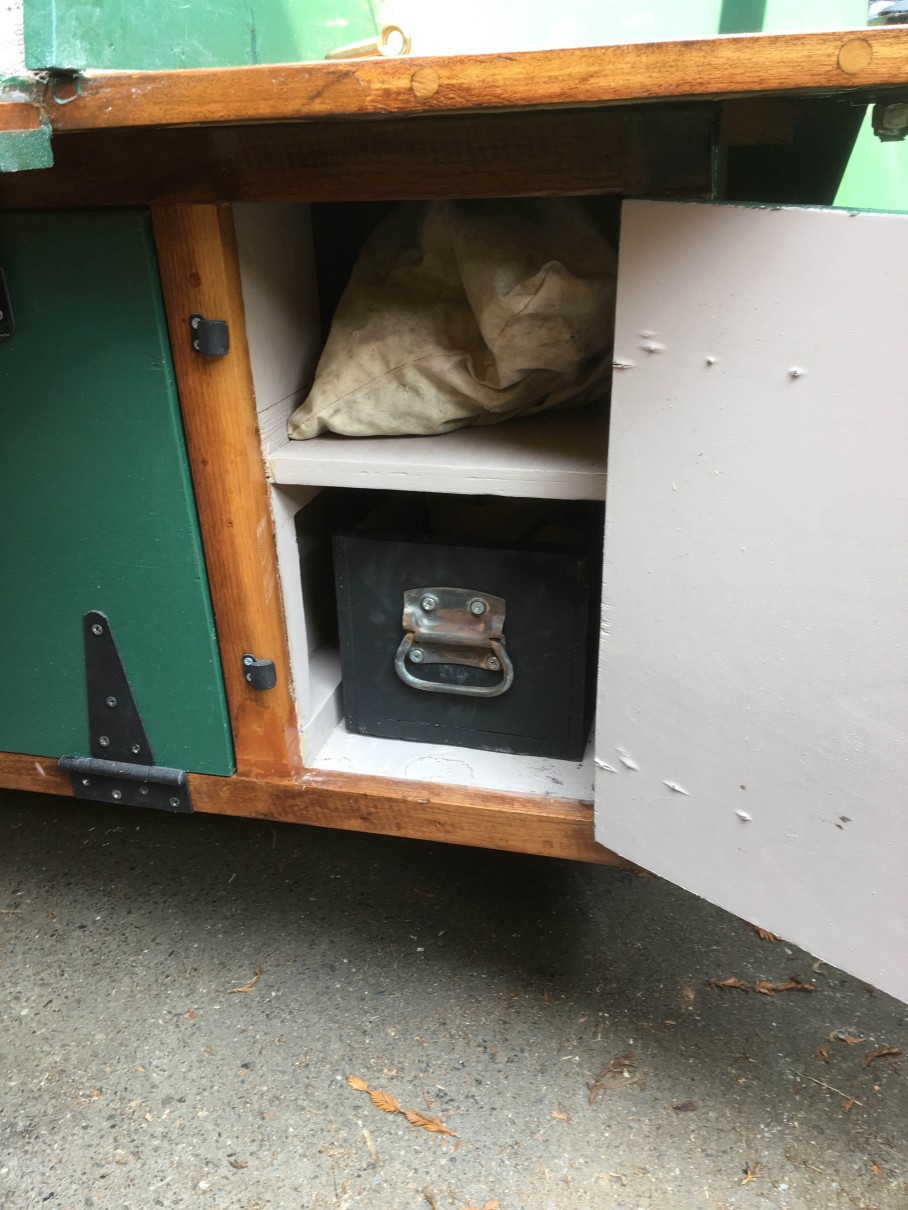
These cubbies are across the back table from the shelves; my wife and I get one each for our overnight bag or basket.

stove-and-heat-shield-stowed

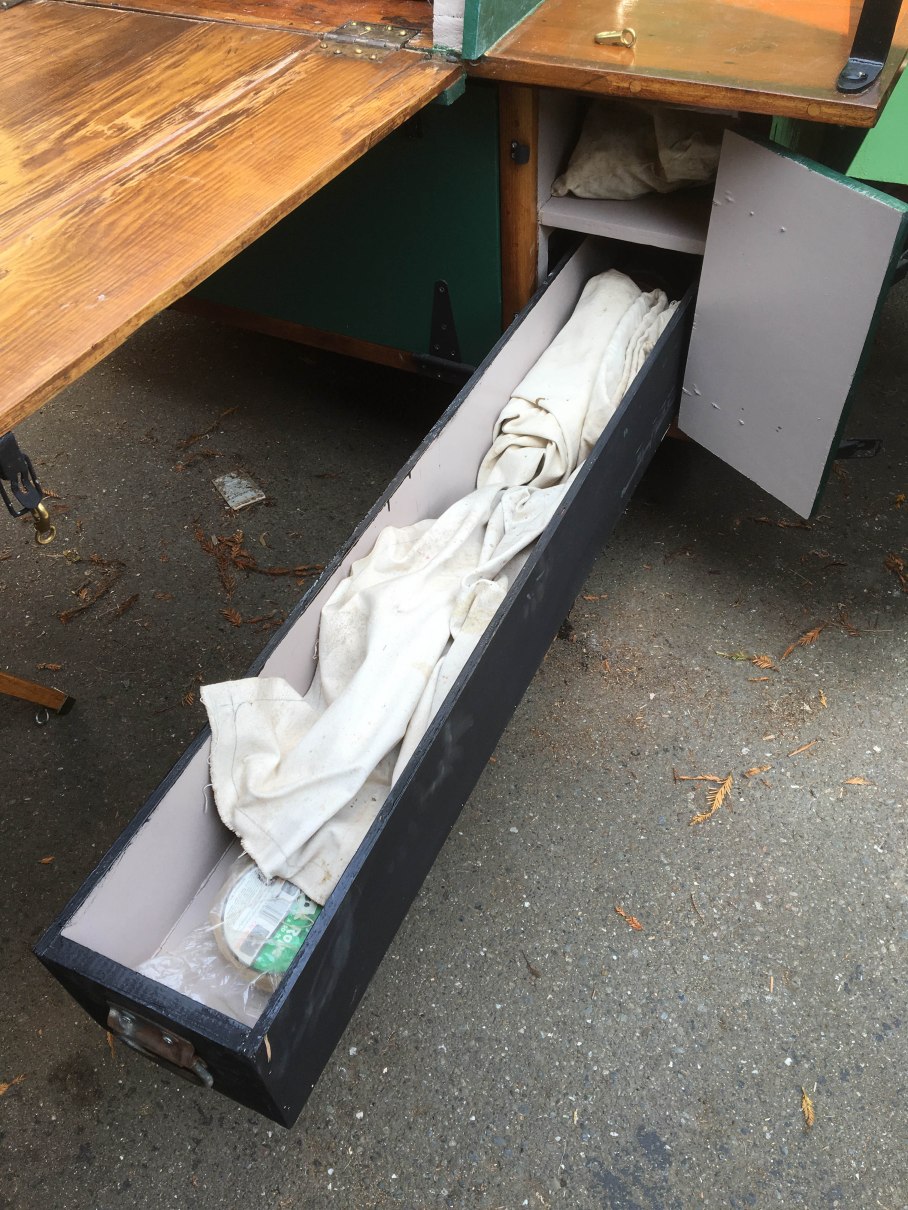
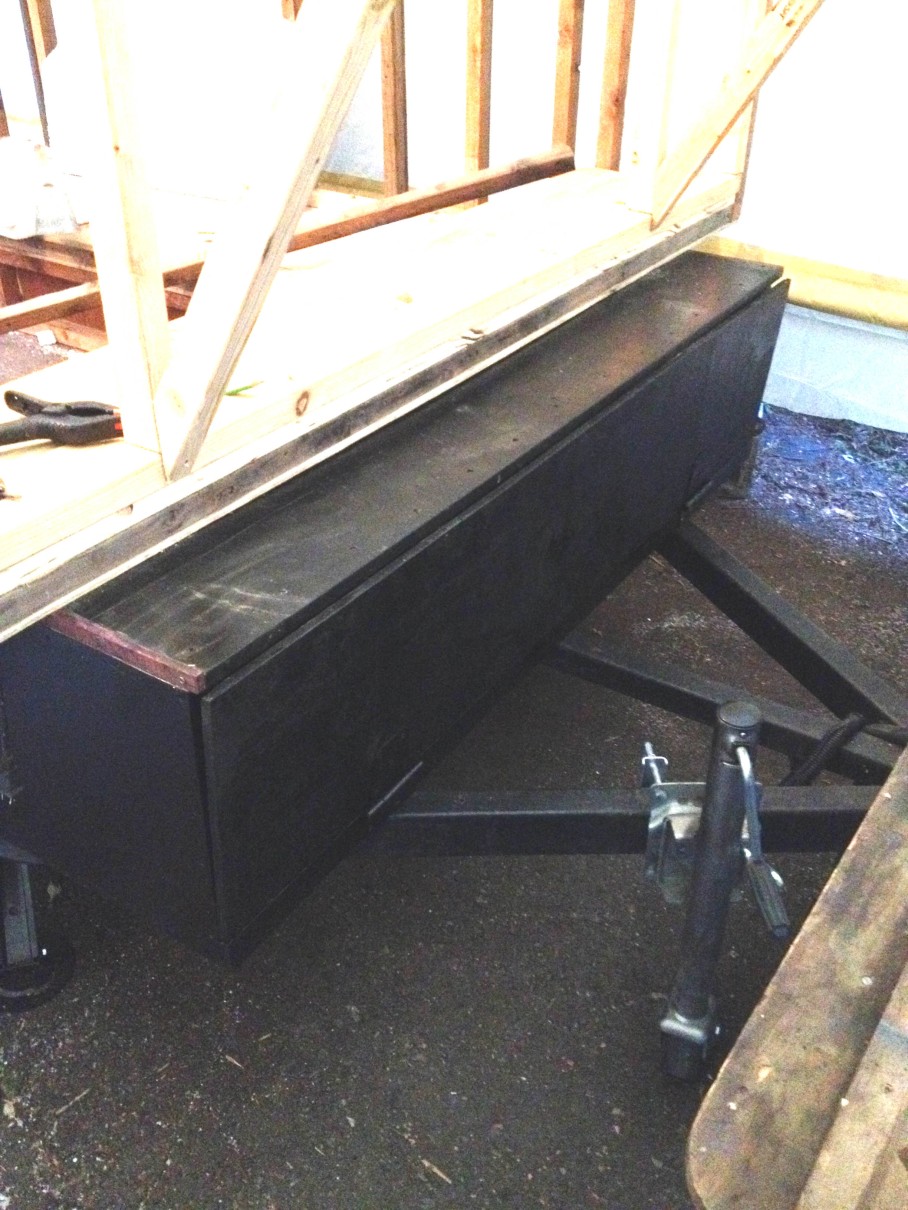
Under the cubbies is this space where the wood stove and heat shield are stowed when not in use. This is also where the Honey Bucket will be stowed.

painted-quarter-view

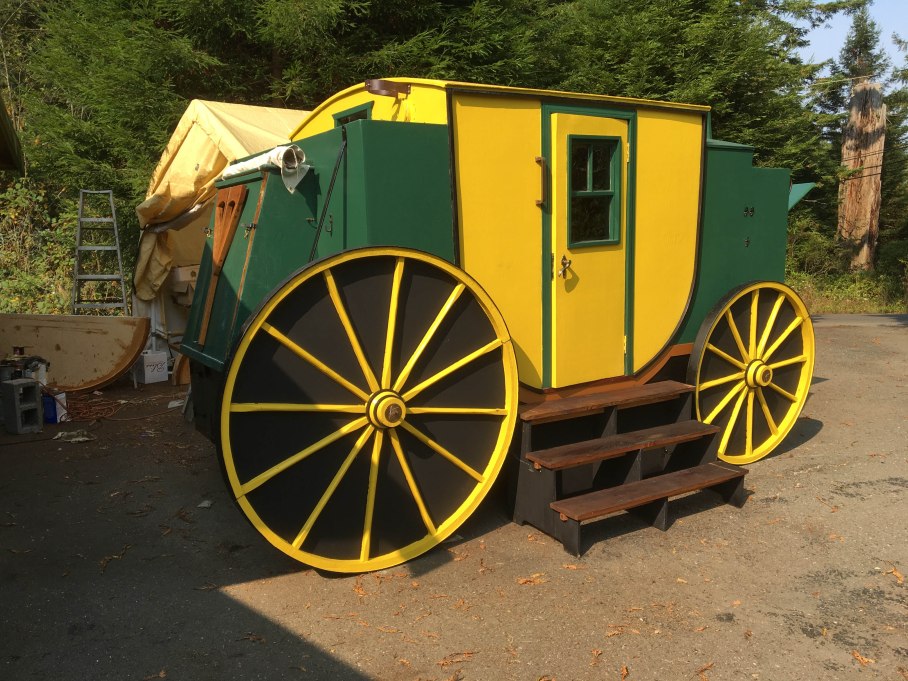
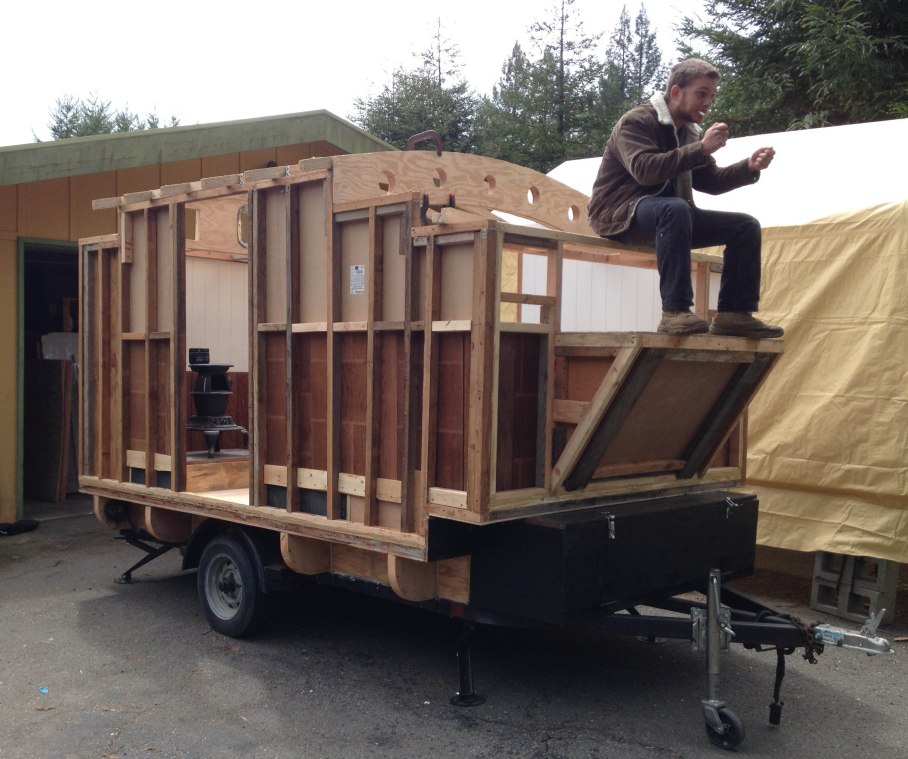
That’s pretty much it for now. I still need to finish the second pair of wheels and the second staircase. We will just have to use it some more to figure out what works and what needs tweeking. We will not be traveling far until I upgrade the suspension. When I get more photos of the Coach set up for camping, or better yet at a historical reenactment event, I will post them here. I hope you have enjoyed following along on the Coach build, and don’t hesitate if you have any questions. ‘Possum

13. More Decorating

side-view-door-open

Side view with door open. Note that the back of the staircase, bottom of trailer side, and the background of the wheels have all been painted matte black. I had originally planned on painting the wheel background with a trompe l’oeuil effect to simulate the brown wagon bed curving up on each side, with green above and black below. But when this was drawn in it didn’t look right except from one specific perspective for each wheel. The problem is that the wheels truly are three-dimensional–if they were just flat discs against the side of the coach, I could have painted anything I like on them. But I just made do with the black background which hopefully gives the impression that the Coach bed is much higher up than the actual trailer bed. Also note the rolled up window shade on the inside door.

painted-side-view

Side view with door closed. On the forward side you can see three little brackets, which hold a large nautical lantern on each side. You can’t see very well but the door is fitted with a lever handle (hard to locate lever handles that work with a mortise lock and spindle, I can tell you). There is also a lovely brass grab bar at each door.

painted-quarter-view

A quarter view of the painted coach. Here are the answers to the questions you are thinking: 1) The paint is floor & porch paint, which holds up well to the elements. It is primed with epoxy–the entire coach was soaked in penetrating epoxy, sanded down and coated again, then scuffed up before painting. 2) The line between the yellow and green paint on the central carriage body is divided by a one-inch wooden molding that I laminated out of cherry wood. This is painted black to help create a prominent shadow-line that helps to make the central compartment pop out. My hope is that to the casual eye this will look like the whole carriage compartment. The top edge is trimmed with a small galvanized gutter painted black, which I hope will keep moisture away from the doors.


12. Decorating

painted-front-view

Front end finished…so much to explain! The footboard is installed; it rests on braces made from laminated plywood that fit into metal sockets (scrounged leaf spring clamps). The sides of the driver seat are built up and connected to the footrest, and the top of this compartment is a bi-fold hatch that forms the driver’s backrest. There are steps made from heavy duty joist hangers, and hand grabs for the driver and shotgun to climb up. You feel pretty high up sitting up there.

painted-aft-view

Aft end finished. You can see the chuck box or “boot” that I built instead of fake luggage for the kitchen. The table leg swings down and gets staked to the ground at whatever angle makes the table flat. There is a canvas cover that gets rolled down and lashed over the boot for transport. 1/4 inch steel braces have been added to help support the back ledge, which I stand on to install the chimney and to set up the awning. The ledge surfaces are sealed with really thick epoxy resin. The back window is trimmed out, and the stove jack has a plug for travel (and for when we don’t used the stove). There is bracket or brace to hold the chimney when it gets used.

aft-view-ii

Another view aft. The back of the wheels are painted black. The coiled line is used for lashing down the canvas boot cover.

pan-box-door

Here is the painted pan box with its hardware.

pan-box-door-open

Here is the pan box with a door open. The upper shelf has a bag with awning stakes, and below that is a long drawer for camp gear. On the other side is the “pole vault” for the awning poles.

pan-box-drawer-out

Six-foot long gear drawer on the starboard side.

kitchen-open

Table in down position showing the chuck box interior. Plenty of room for a camp kitchen. Remember, the compartment under the chuck box contains a full sized cooler. This shot also provides a good end-on view of the rear wheel showing the spokes and banding on the hub. They look real enough that I have had several people ask how well they roll down the freeway. The tires and the coach undersides are painted in this amazing two part epoxy paint provided by my mate Jean Gabier.


11. Insulating and Skinning

insulation-begins

Foil backed rigid insulation being fitted into every bay of the frame

insulating-in-progress

Starboard side nearly done and ready for skinning.

insulation-and-front-skinned

The front end has been insulated and the 1/4 inch fir marine plywood is glued and screwed down. You can also see how the forward top bulkhead has been framed and the “driver’s seat” has been sealed in. The step-down from the main roof has been skinned with openings for the portholes.

coach-side-view-sm

All the outside surfaces except the roof and sides of the footrest have been skinned. The corners and seams are being filled and faired with thickened epoxy. And I have made cardboard mockups of the wheels and stairs–the first time that the Coach actually started looking like a coach.

coach-back-view-sm

Aft view with the skin on. A lot has happened here and I fell behind on taking photos. First of all, the roof is on. The inside ceiling was covered with pine planks and all the seams filled and caulked (very boatbuildery). The curved bays of the roof were insulated with battens of non-rigid insulation topped by Ecofoil. And you can tell from the edges here that I have already glassed the roof with fiberglass cloth filled with plenty of epoxy resin. Also note that the pan box has been given a face frame and doors to each compartment.

laminatng-wheels

Beginning lamination of the wheel felloes using special super-bendy plywood from our friends at Almquist Lumber. The top or outside strip is taller and will be painted to look like an iron tire. This was the “master strip” and it was edge glued and screwed to the plywood back board, and served as a mold for the rest of the lamination. You cannot help but notice that this is only half a wheel–they do in fact fold in half using piano hinges otherwise they wouldn’t fit in my truck or in the coach for transport. The front wheels are four feet in diameter and the rear wheels five feet in diameter.

wheels-doors-and-stairs-ii

Two wheels are half finished (spokes and banding to come), and propped in place for effect. The hubs, turned by my talented friend Mike Rude, serve as clamps to hold the wheels open. Between them is an ingenious folding staircase which is surprisingly sturdy. Oh, and did I mention the door? I built two doors using salvaged windows. They are insulated too. One of the doors didn’t lie flat with the coach side so I had to build up the molding around it to hide the defect (and repeated this on the other side). Coach and carriage doors almost never have outside trim, but I kinda like the effect.

At this point, dear reader, I really started falling down on taking pictures, and the Coach project languished while I addressed other concerns like plumbing, bathroom remodeling and earning a living. But read on to see more of the finished project!


10. Paneling the Inside

front-window-paneling-in

The front window is framed and installed, there is bead board paneling on the forward and upper side walls, and redwood wainscoting is installed throughout the interior. More of the black pine decking is laid, and black pine trim boards frame the cupboard opening.

paneling-wainscoting

Forward and aft upper bulkheads are skinned with the quarter inch marine ply. Many thanks to my friend Lisa Perrone Thompson for providing the bead board paneling, the pine framing lumber and pine planking that was used for the ceiling. You rock Lisa!

rear-paneling-window

Aft upper bulkhead is skinned and the very tricky marine window installed. It has slanting sills that required a slanting window frame. The window came without glass so I glazed it with some heavy perspex that I had. Next to the window you can see the hole for the stove jack. The back corners of the interior are paneled with cedar planking that I cannibalized from a camp bed I built years ago.

cedar-paneling-rear-window

Back corner, cedar-lined, that will become the hanging wardrobe. The bottom of the wardrobe has oak flooring, which reminds me that somewhere in here I put down 1/2 inch oak flooring (from Craigslist of course) throughout the Coach.

stove-tryout

Trying the stove out for size, This a wonderfully Umco 28 pot bellied stove that I traded Eric Hollenbeck another stove for. That is not the actual stove position–it goes on the locker forward of there.

first-test-drive-ii

My son Colin takes the Coach for its first test drive. Here, the interior is mostly paneled or skinned, and we’re ready to start on the outside.

9. Framing the Back

rear-framing-ii

Back is basically framed here. Note the heavy cross piece where the kitchen will hang on the outside. Also note the intriguing openings between the stem walls. Also, you can see that a rear window frame is being played with, and that bird blocks have been installed between all of the rafters.

rear-framing

A closer view

pan-box-framed-playing-w-kitchen

Here the back wall has been skinned with 1/4 fir marine plywood, and the pan box has been framed in. Now you can see the purpose of the spaces between the stem walls–they are connected front and back in the tool box and pan box, providing 12 feet of space for awning poles. I call them the pole vaults. The pan box on a gypsy wagon is where the cooking pots and dirty fire tools are kept, but it also fits an ice chest nicely. Also here you can see I am playing with boxes for kitchen gear that I was planning to disguise as vintage luggage and trunks. Ultimately, I decided to go with a chuck wagon kitchen box that has a large drop-down table.

8. Framing the Roof

roof-beams-ii

Laminating plywood for the roof beams. This is where boat building experience comes in handy. And lots of lead.

roof-beams-ripped

The lamination has been ripped into curved roof beams. This nearly killed my table saw. Afterwards I went and bought a new Diablo saw blade which really helped the rest of the project.

roof-beams-installing

Roof beams installed with your basic hurricane ties. Later they will be trimmed flush and bird blocks will fill the spaces between them.

roof-beams-installing-ii

More rafter installation. It was around this point that I decided the forward stepped-down roof would be curved as well as the main roof. This makes the interior space (above the couch/bed) so much roomier and no one has clocked their head yet. It also provided a neat forward bulkhead with a curved top where I have put the weapons rack.

forward-bulkhead-with-portholes

Here the space between the two rafters at the step-down has been filled with a solid wood piece that is pierced for portholes.


7. The Toolbox

tongue-box-bottom

Fitting the floor of the tool box or tongue box.

front-overhang-framed

Front deck framed over the tool box. Floor of toolbox has bottom plates attached.

tongue-box-built

Here the tool box is finished with drop-down door.

tool-drawer

Big damn drawer in the tool box has…well, tools. Underneath the space goes back three feet in the middle and that’s where the spare tire lives. On the inside, the box is open to the spaces between the stem walls. You’ll see why later on.

6. Framing the Walls

wall-framing-begins

Basic framing of a side wall with door opening. The material was very old, very light redwood 2×3. The sill plate will get glued and screwed to the ledge box.

wall-framing-begins-ii

Another view of the side wall frame. This six-foot section defines the height of the central part of the coach compartment.

both-walls-framed

Here the forward, stepped down parts of the sides have been framed. A bulkhead has been built across the front well to define the inside bench area, and a little hip wall is built across the front to support a short piece of deck that extends beyond the square part of the trailer frame. This deck is supported by the tool box and the side walls. This little extension forward was necessary in order for the bed to not interfere with the doors when it is deployed.

footrest-framed

Here the front end is starting to be framed in, including the footrest that extends forward over the trailer tongue

front-framing-inside

More front end framing. This is the flat surface where the driver will sit. Doesn’t look it, but trust me.

front-framing

Look! The floor of the footrest is covered in plywood. The big open space is where the front window will go.

front-deck-installing

Here you can see some of the final decking installed forward. This and all the decking, locker tops and some interior walls are out of this gnarly black pine lumber that was kindly given to me years ago by Roy Kohl.

footbox-interior-skinned

Paneling the inside of the footrest, using a beefy piece of masonite I had laying around.

footbox-front

Outside view of the paneled foot rest, which is also beefed up with lumber to support the brackets that will support the foot board that will be hinged to the foot rest.

5. Building the Ledges

stem-walls-and-ledge-placement

Inner and outer stem walls are attached and the ledge bottoms (cut from 10′ CDX plywood) are being fitted.

framed-ledge

Ledge boxes are framed in and glued and screwed down to the stem walls.

tongue-box-bottom

Fitting the floor of the tool box or tongue box.

ledges-are-insulated

Ledge boxes insulated with rigid foam.

insulating-ledges

Tidying up as we go… Once insulated, the tops of the ledge boxes are closed up with more 1/2 CDX plywood. The two stem walls support a rigid cantilevered box–the support brackets aren’t even needed. I was able to stand on the edge of the box with nary a wobble.